D018 (Code of practice for the initial and periodic
examination, Testing, and Certification of Diving
Plant and System)
D040 (DESIGN for mobile/portable surface supplied
systems)
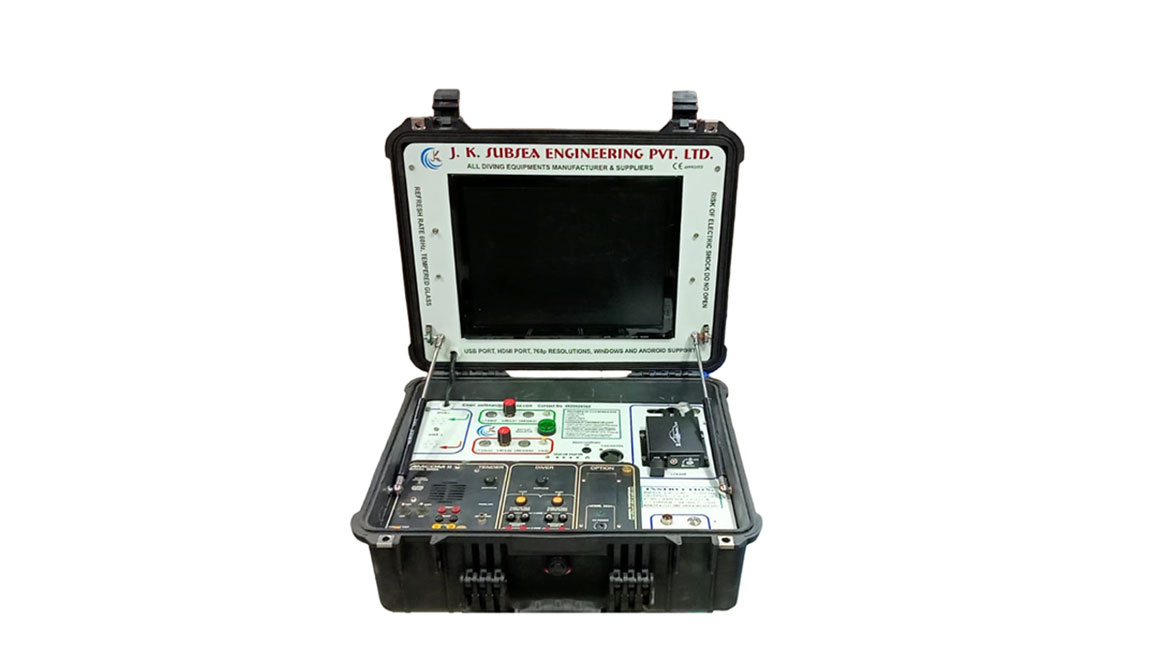
JKSEPL introduces its meticulously crafted CCTV
systems. Available for One, Two, or Three divers, with
or without Advanced Communication functionality,
these systems are equipped with a state-of-the-art DVR
for seamless storage of High-definition video and audio
captured by Underwater cameras and lights. Encased
within robust Pelican cases, our systems prioritize safety
and reliability, ensuring unparalleled performance in
challenging underwater environments.
PORTABLE DIVER CCTV PANEL - JK2DCS
2 DIVER CCTV SYSTEM WITHOUT RADIO - JK2DCS
3 DIVER CCTV SYSTEM - JK3DCS
3 DIVER CCTV SYSTEM WITHOUT RADIO - JK3DCS
PORTABLE DIVER CCTV PANEL
Technical Specification for CCTV System
Each Diver is with the CCTV System
Storage for Diver 1 & Diver 2 is combined while the
storage for Diver 3 remains separate as previous.
Mobile DVR with dual SD Cards 128 Gb slot
(combined).
This CCTV system is also provided with a Amron
Diver Radio for communication between the
Supervisor & Diver
For 2 Diver System use 2 Diver Radio
For 3 Diver System use 3 Diver Radio
Other Equipment equipped with this system:
Underwater Light (JK-137)
Underwater Camera (JK-138)
System Startup:-
Turn on the Main Switch. This will also power up
the monitor.
Activate the DVR Switch located on the panel.
For using Diver 1 with the Camera and Light:
Attach the light and camera to the Marsh
Marine mounted on the side of the case.
After attaching, turn on the Diver 1 Camera and
Light Switch.
Your camera and light will now be operational.
System Charging:
Turn on the toggle switch on the panel.
Connect the system to an external 230V AC power
source for charging.
Turn off the toggle switch to check the battery
health.
Monitor the battery indicator until the voltage
reaches 13V.
The maximum charging duration is 2 hours.
System Recording:
Insert the SD Card into the SD Card Slot on the
DVR.
Press the Rec Button on the DVR remote or the OK
Button to start recording.
Press the SNAP Button on the remote to capture a
video snapshot.
Press the Stop Button to end the recording.
To review the recording:
Press the MENU button on the remote.
Navigate to the DVR Video Folder and select
the video file.
Radio Operation (if applicable):
Turn on the Radio Power Toggle Switch
Insert the Banana Plug Communicator into the
radio.
Turn on the speaker toggle
To communicate with the diver:
Press the Push-to-Talk Button.
Connect the yellow and black Banana Plugs for
Push-to-Talk functionality.
Recording from Radio:
Attach the RC Connector from the radio to the
Audio Out of Diver 1 and 2.